The following may help you complete your fuzz face.
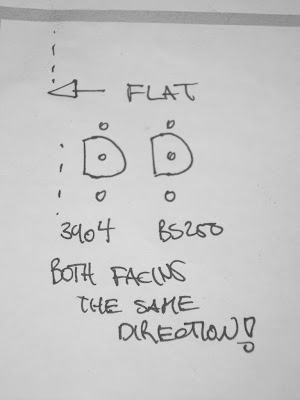
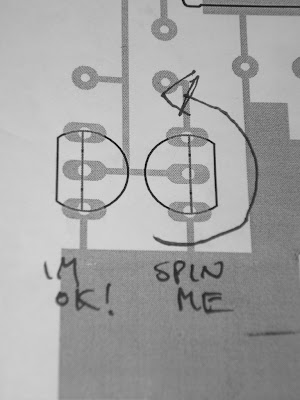
First off as most people know from coming out last week, one of the transistors on the layout sheet is facing the wrong way. It is the p channel fet that was given out on that sunday. the orientation should be rotated 180 degrees. see the photos below.
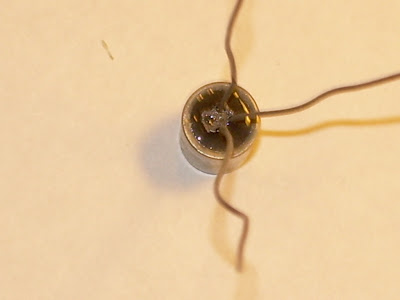
Next up, germanium orientation. If you look closely at te bottom of the germanium transistors youll see the leads are not really in a straight row. instead they form abit of a triangle.
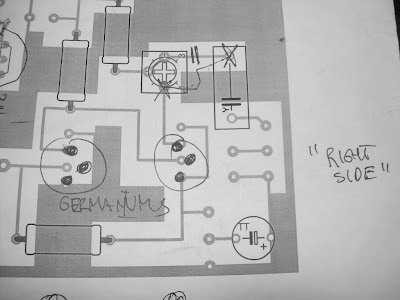
flip the board so that teh component side is facing you.
rotate the board so that the pots are in what you would consider the "lower right corner".
the input jack should be on the left and output on the right.
now populate the BOTTOM 3 PINS of the socket with germanium transistor such that the MIDDLE LEAD is closest to the RIGHT SIDE off the board. The orientation is the same for both germaniums.
Before the next step you may want to test your pedal to see how you like it. I spent some time with Maria's pedal and found the output was not that high and sort of nasaly sounding. The current gain of the transistors we have is not quite as high as the ones specified. but luckily it is easy to compensate. heres how.
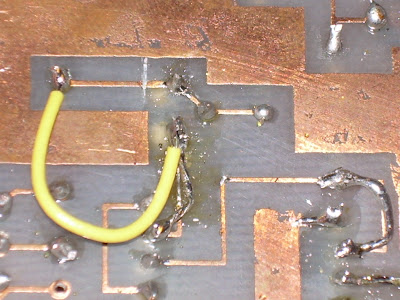
Instead of a fine tuning mod we will use the trim pot as a large gain adjustment. Simply cut the trace from the output cap to the trim pot and solder a wire from the cap to the other side of the trim pot. Look at the photos.
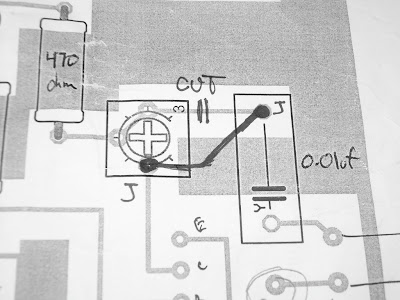
Heres the mod on Maria's. ONLY AD THE YELLOW WIRE. teh other wires were added to replace lifted pads and may not be required. (definitely not required for the "mod")
Now play with the pot until your desired output level is achieved.
IF you still have questions please either make a post or make a comment. if you are confused it is likely other people will be too so it is more useful to ask in a forum accessible by everyone as opposed to through email. THANKS
